The Genesis of a Lord of Change
Posted: 2010-08-29 11:45am
I'm thinking about starting a small 40K Tzeentch daemon force, but given my small budget, and long list of more important things to spend on, I figured I might just have a go at making them myself. Hey, how hard can it be if a pack of Poms can manage it, right? 
And so this records the creation of my Lord of Change, using the Lost Wax process of casting.
First thing I realised is that I didn't have to try and copy GW. This is Chaos, right? And Tzeentch, the Changer of the Ways at that. They would look like all kinds of different shit, some scary, some sad, some cute, some just plain weird. I'd be best served keeping everything I make unique.
Unique. Original. Every single figure. Ummm... shit.
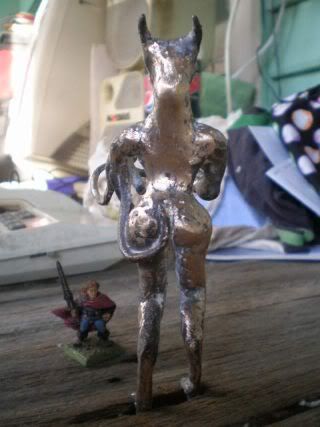
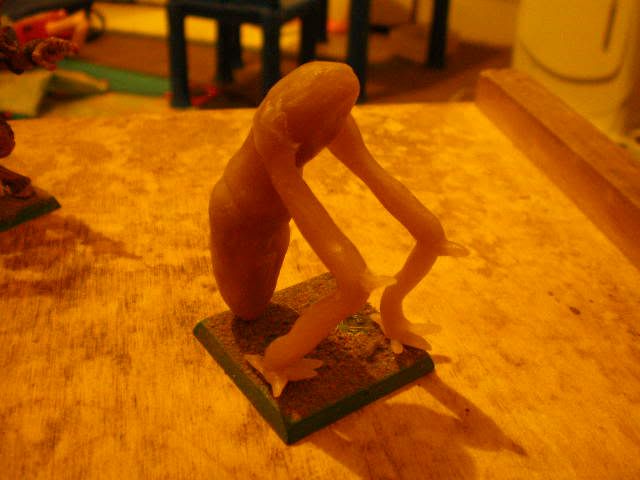
So I start by just working some wax into shapes while thinking, and then I start thinking... eyestalks.
The wax I'm using here is a custom blend of bee's wax and, ummm, something else (might be petroleum jelly. The wax bloke told me, but I forget) at a ratio to create a wax that is carveable at room temperature but mouldable at body temperature. It's also sticky enough to accept having extra bits of wax added and merged in easily.
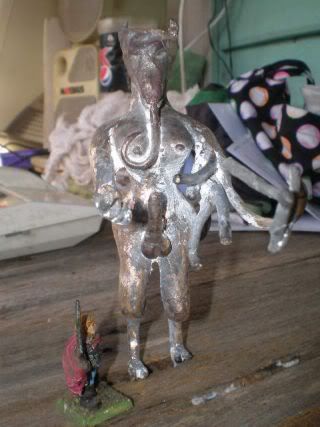
The creature starts taking shape. I'm sticking it on a base here to make sure it fits. A fantasy base, since that's what I have handy.
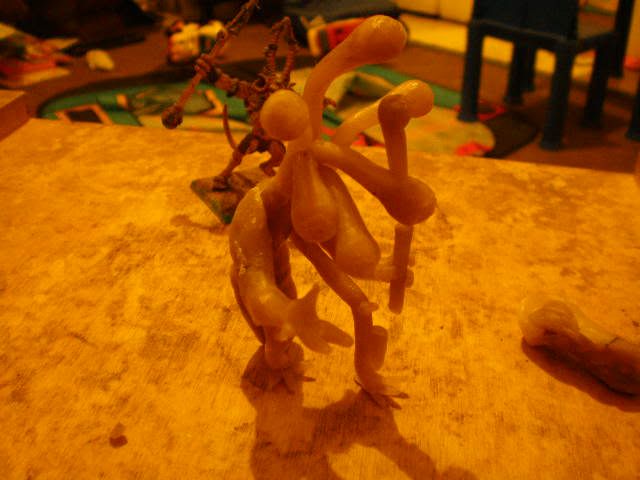
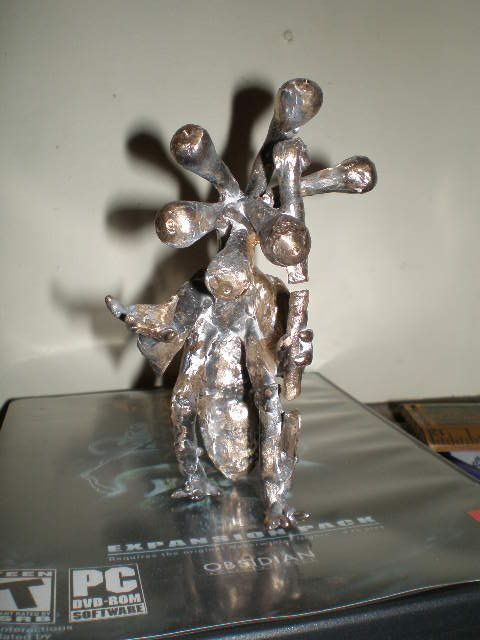
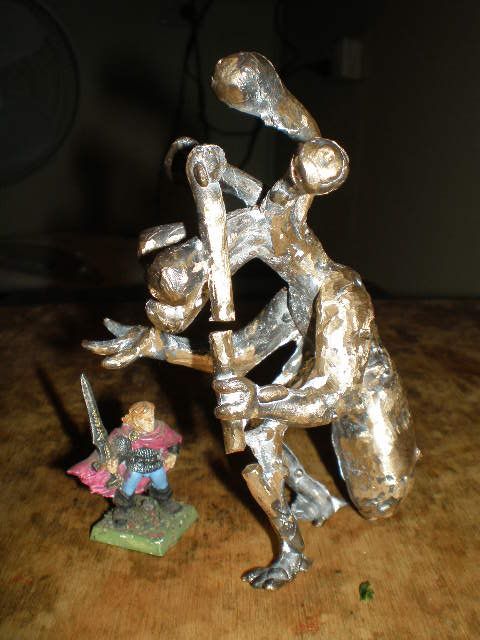
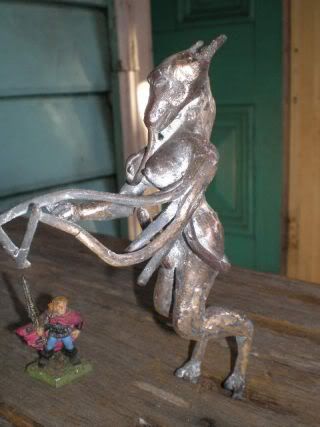
The finished wax. I'm trying an idea here where the staff is in three pieces, but still floating in place as if it is whole, just hovering there in space. As "hovering in space" is a difficult trick for metal to do in the real world, each piece is in fact connected to the figure. The centre is of course held in its hand, while the top piece brushes against an eyestalk, and the bottom 'happens' to rest against his leg.
Behind the Lord of Change, you can see a Verminlord that I was using as a size comparison while I was making the figure.
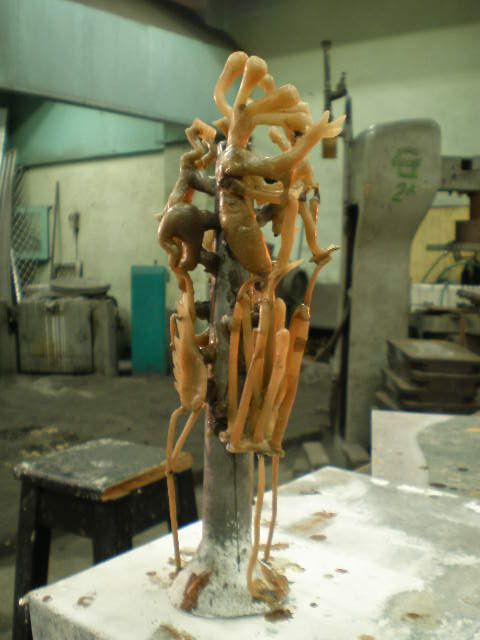
Next, he has to be connected to a tree. You see here the Lord of Change surrounded by other daemons of various types. The trunk of the tree is aluminium, short wax in-gates attach the figures to the trunk, and drips of molten wax are used to solid the join (don't skimp on the molten wax. Something coming loose later is a major, and often irretrievable, disaster)
The important thing to know about this tree when understanding how it works, is that it is, in a very real sense, upside down.
Upside down, upside down, Miss Jane!
Looking at it this way, the metal pours into the top, and the mushrooming out at the top creates a handy pouring cup. The metal runs down the stalk, through the in-gates, and into the figures.
Near the top, you can see thin wax lines running from the figures. They're called whistlers, and allow air to escape. They're attached to every significant high point where air could be trapped, and can sometimes be a bit of a delicate bugger to attach.
As you can see, there's a fair amount of figures, stuck all around in any way they can fit, and the whole thing is rather complex. This is to get the most figures for the least amount of time and material, although there are drawbacks to doing this. (More on that later)
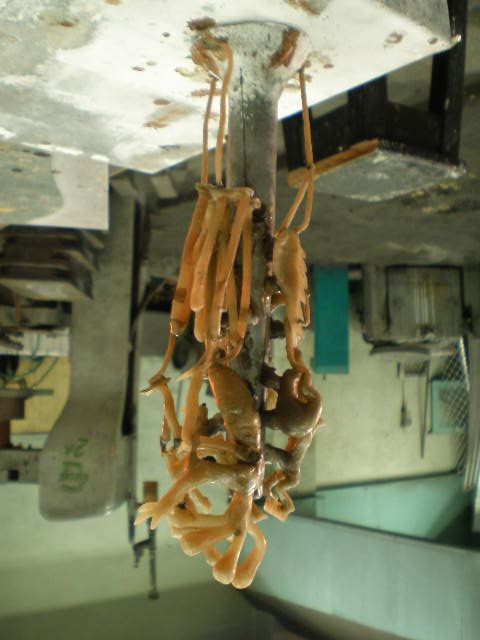
Notice the gap between the top of the stalk and the top of the figures, which is a bit of an odd thing considering I've just intimated I'm trying to get the most out for the least cost. The reason for this is two-fold. Firstly, the extra height provides more pressure from weight of metal to push the metal into the figures, and secondly, and more importantly, to try to prevent shrinkage. As the metal hardens, it shrinks, and when it shrinks it draws in molten metal to fill the void, and it firstly tries to get it from above (letting gravity do the work). This means the metal level in the pourer spout will drop from the level you fill it to, sometimes quite precipitously (depending upon the shape of your job). If the level falls below the level of your job, you will likely get shrinkage in your job. Throw it away, try again.
Shrinkage is something you always have to keep in mind when casting. The metal will shrink. It will try to draw in more metal. Where will it draw it from? If you don't give it an easy source, it'll create one of its own.
Also, only liquid metal shrinks (OK, all metal expands and contracts, solid, liquid or gas, but for this foundry usage of the word "shrinkage", OK?), and mostly when hardening, and it only draws from liquid metal. This means a few things, some you can take advantage of, and some you have to look out for. For instance, a thin spindly job attached to a thick chunky pourer will freeze off well before the pourer, meaning the job will be able to draw from the pourer till it freezes off, and then the pourer can't draw from the job (this is partly what I'm doing). If you reversed that, having a thin pourer into a thick job, the pourer would freeze first (drawing from you job), and then your job would be isolated and would cannibalise itself.
A thick pourer is a bugger to cut off, and so you may want a thin connector between the two (the connection between the pourer and the job is called an "in-gate"), which is easier to cut. However, if that thin connector should freeze before the job, then your job may be cut off from its metal supply, and it will cannibalise itself. This can often be avoided by making the in-gate short enough so that the nearby heat of the pourer keeps it molten. You hope.
If it's a big job, and the pourer is too far away, then all the best intentions in the world wont stop shrinkage in the far reaches. In this case, you can use "risers", which are extra shafts, similar to the pourer, connected to your job. The metal rises up in them from your job while you're pouring, and you continue pouring until all risers are full (if they don't fill properly, you can also pour metal down into them, and pray). Then while your job freezes off, it can also draw from the risers; they also help prevent air from being trapped. A teacher once told me that as a rule of thumb, a riser protects a radius equal to twice the riser's diametre.
Anyway.
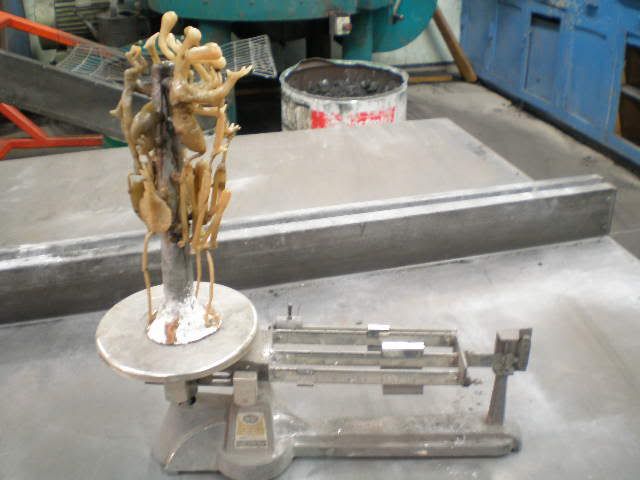
Weighing the completed tree. As you can see, only the latest high-tech gear for us!
As I already know the weight of the aluminium stalk, this step tells me how much wax is in the thing (and it's a step I regularly forget. Oh well.)
With a weight of 462g, but the stalk is 350g, that leaves 112g of wax. Must write that down somewhere, or I'll forget.

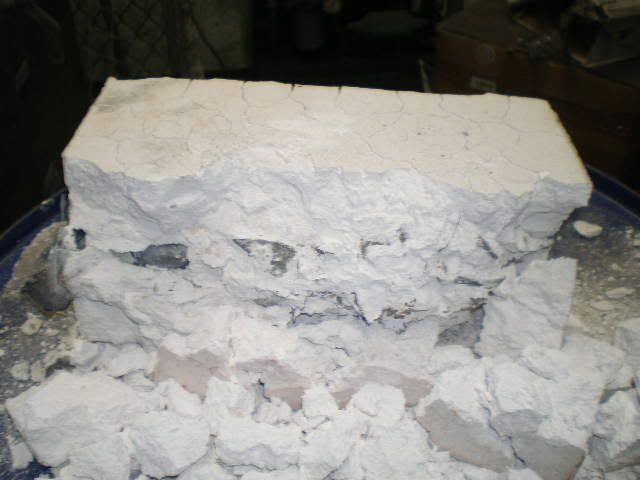
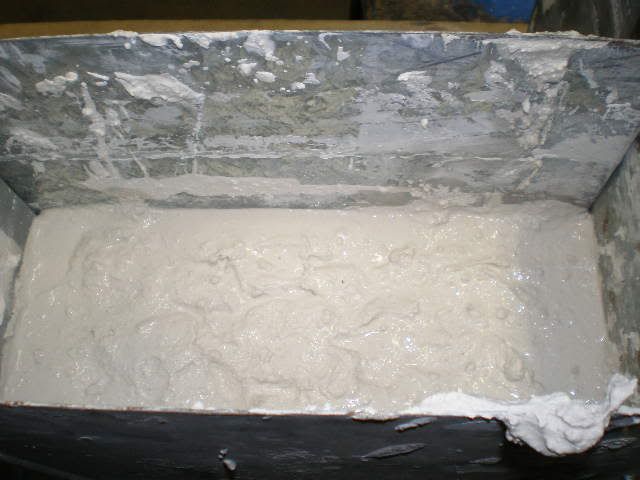
Into the plaster box! This is a top-down photo, where the tree has been screwed onto the side of the box by dint of a small hole and bolt. It's important to leave a comfortable margin between the wax and the sides of the box. I generally go for about 15-20mm (about 3/4 inch for you Yanks)
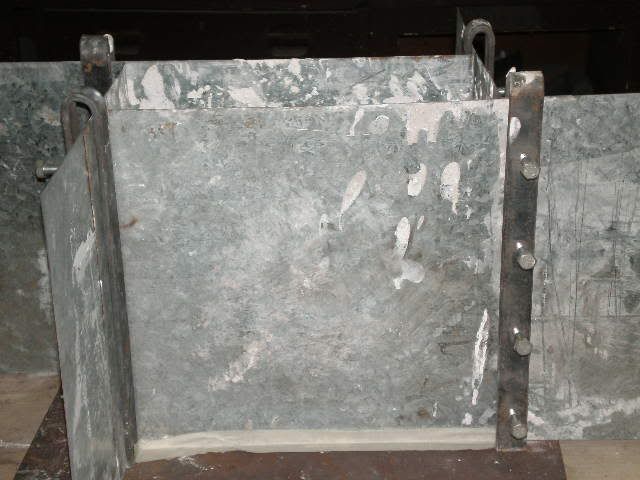
The actual box design. All it is is four sheets of steel, two are 350 x 300mm, and two are 650 x 300mm. The last 50mm of each long end is then folded in a right angle. These sheets then form the four sides of a box, with the folded tabs butting up against the neighbouring sheet enabling them to be clamped together. The clamps were made out of 25 x 6mm flat bar mild steel, with holes drilled and tapped to take four bolts running along the length.
This creates a box that can be adjusted to any size inside the length of the sheets, and if you need a larger box, just cut some longer sheet steel. It has, of course, no bottom. Put a sheet of something underneath (I use sheet steel), and then seal the join all around (I'm using masking tape here, which is enough to do the job).
The plaster goes in. It would have been nice to take a few photos of pouring the plaster, but I'm working on my own here and frankly it's either pour plaster or take photos, and the plaster's setting fast. Suffice to say it's a fraught operation as plaster is heavy and if you pour the weight of it on your wax tree you will likely knock something loose, so you have to be careful (and you didn't skimp on the wax drips when attaching the waxes to the stalk, did you? This is when it comes back to bite you). However, the plaster is also setting very soon, so you have to be fast. Careful and fast; a wonderful combination.
To help the plaster get into all the spaces, and to try to displace bubbles, I've also stabbed my fingers nto the mix and agitated them around a bit. Tapping the outside walls of the box to try and create ripples also sometimes works.
Another point. The plaster is heavy, and any decent height of it (15cm or so) will bow the sides of the box if made out of the thin material I have. Brace them with something.
The plaster mix here is 500ml plaster to 500ml grog* to 500ml water per litre capacity of the box. This makes a firm mix that I'm experienting with, and I may add a little more water on later jobs. The firmer the mix, the harder it is to pour and get into intricate spaces but the better the plaster quality you get for firing.
* Grog is an aggregate added to improve the thermal shock and crack resistance of plaster and ceramic. It can be made out of many different things, eg firebrick, fired ceramic, or in this case old fired plaster (which I seem to have a lot of lying about, for some reason ) I don't actually know that it iproves crack resisitance of the plaster, but I'm pretty damn sure it means I don't have to use as much fresh plaster with every cast.
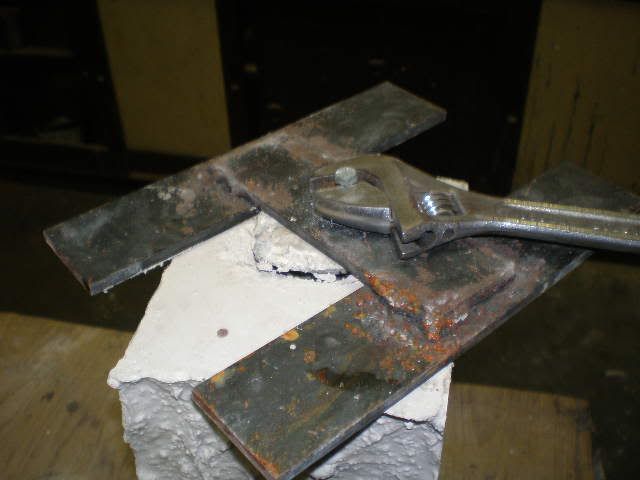
After the plaster's hardened, the aluminium stalk is removed (come on, you didn't actually think it was staying in there did you? How would I pour the metal in?) This set up is just a bolt screwed into the hole in the base of the stalk through a brace, and a nut screwed down the bolt pushing against the brace therefore pulling the bolt (and stalk) up. Note carefully the extremely shoddy welding on show. If I ever offer to do some welding for you, RUN!!!
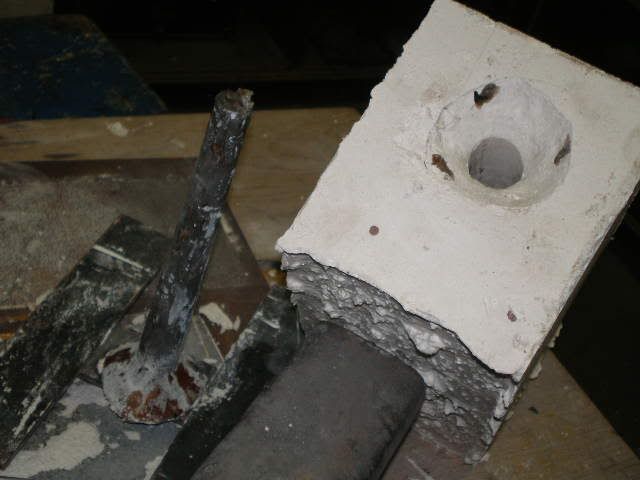
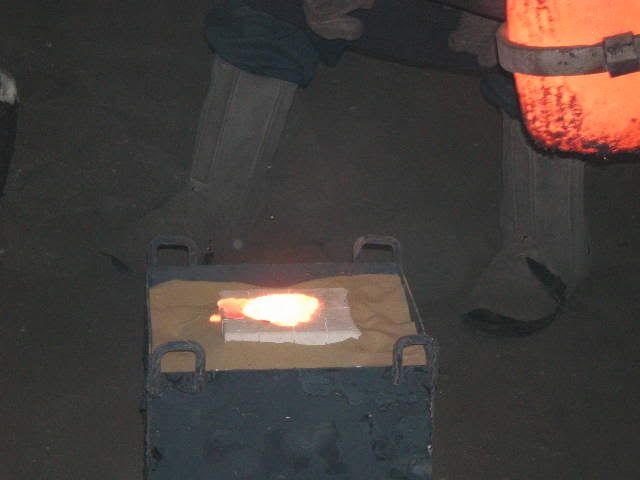
With the stalk gone, the pourer is clear, including a nice funnel. The three dark splotches near the rim are the three whistlers to let air out. While they are around where I'll be pouring metal, near the rim like that they're not a problem (and it's just so bloody convenient, being able to attach it all together in one portable lump)
Around this point, I notice I'm not wearing my wedding ring, which I always wear despite that over the last couple of years it's become a bit loose. It must have slipped off somewhere. When do I last remember it being on my finger? I don't. What have I done today where it could possibly have slipped off without me noticing? Sudden recollection of me stabbing my fingers in and out of thick setting plaster. Oh shit...
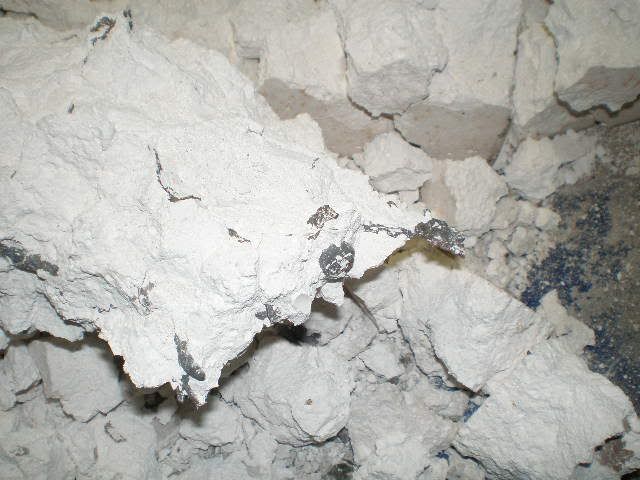
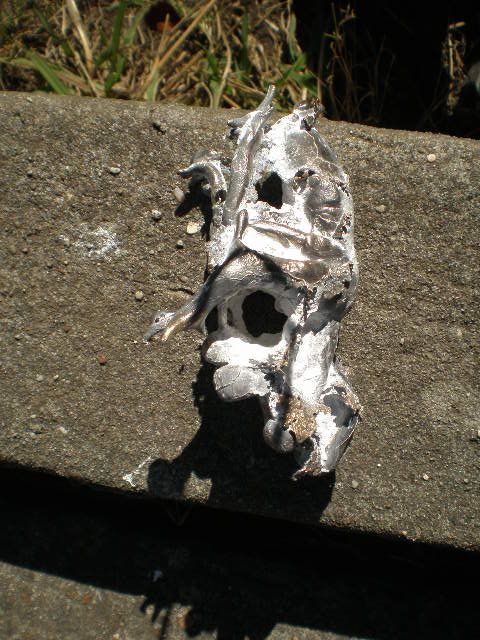
The next step is to take the wax out, preferably recovering as much as possible of it for re-use.
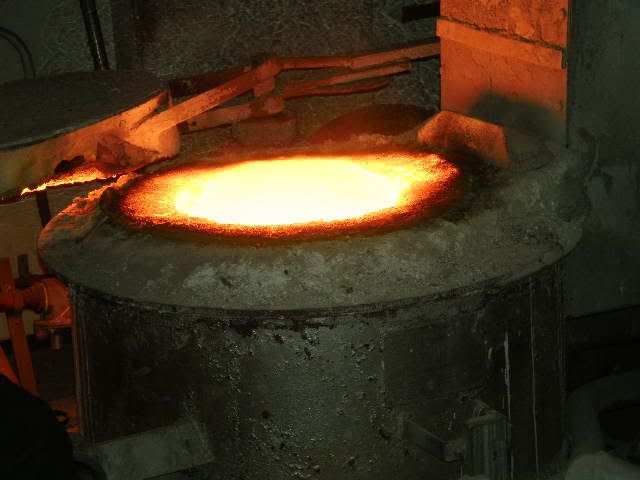
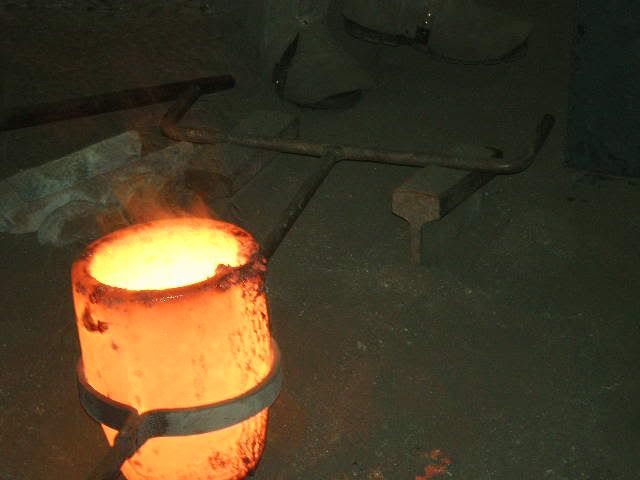
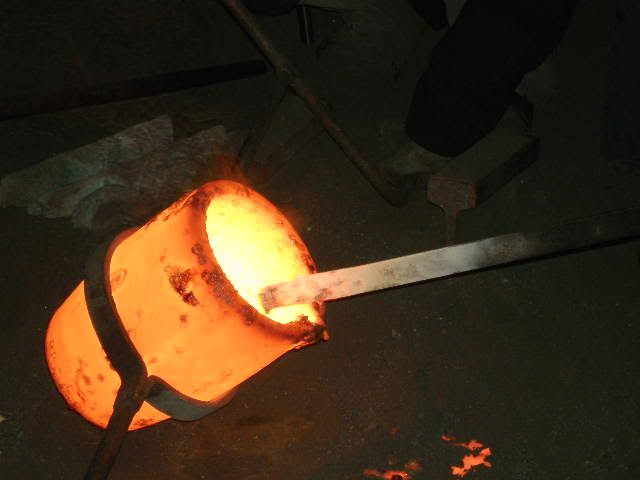
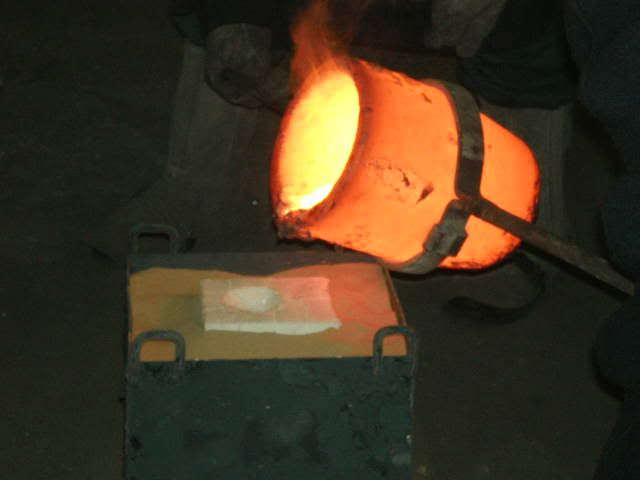
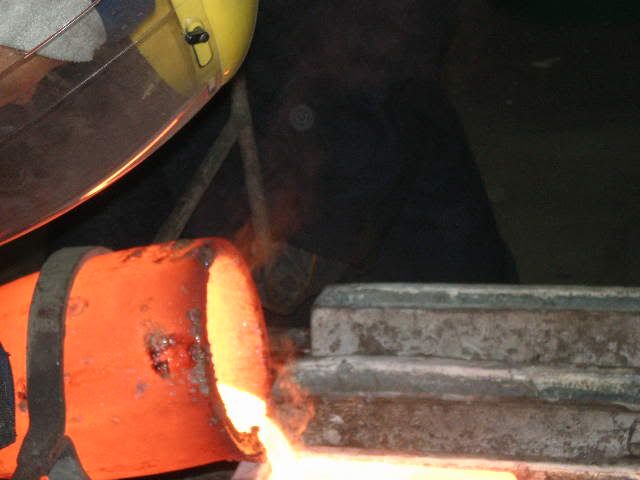
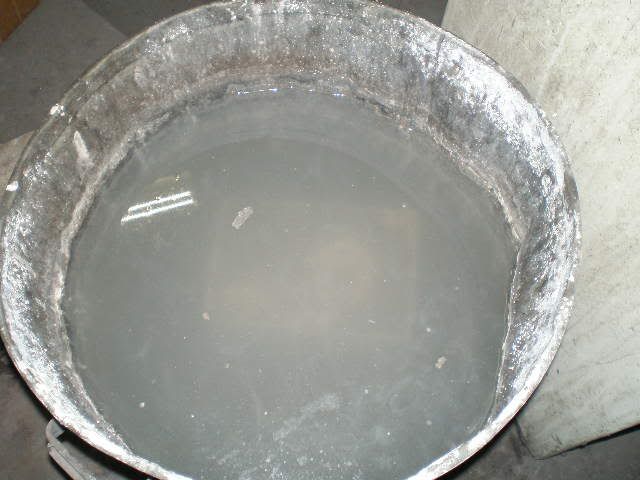
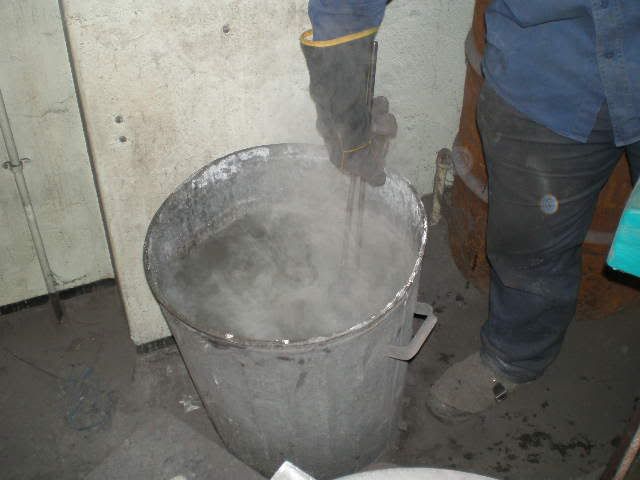
It would be possible to do this in an oven, put the plaster in upside down and melt it out, except for a few problems. Firstly, it seems that if the plaster is allowed to dry prior to the firing process, it worsens cracking during the firing; secondly, the wax tends to soak into the plaster instead of dripping out the holes; finally, melting wax out of a heavy block of plaster is a long operation, and if left unattended in an oven the wax may reach smoking temperature, and possibly even catch fire. For these reasons, my preferred method is to immerse the plaster in water and bring the water to boil. It keeps the plaster moist (which also prevents the wax from soaking in), the temperature wont exceed 100C (so no risk of burning the wax, or the building), you can leave it and a large enough body of water will hold its heat long enough to do the job before it gets cold, and the wax collects on top of the water for easy removal. What you see here is an old-style garbage bin. If you look closely, you may see the plaster mould under the murky surface.

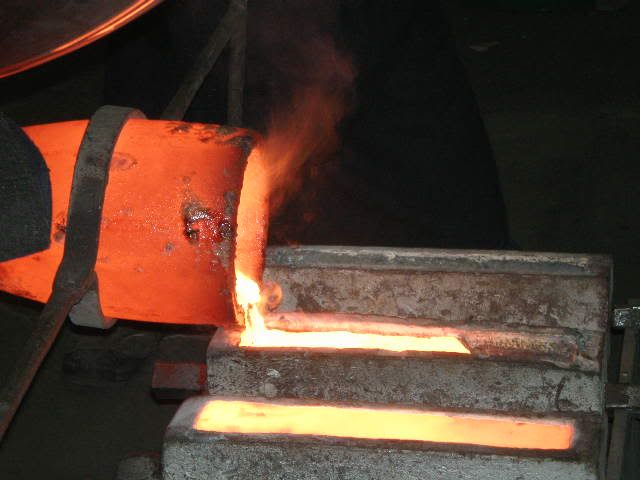
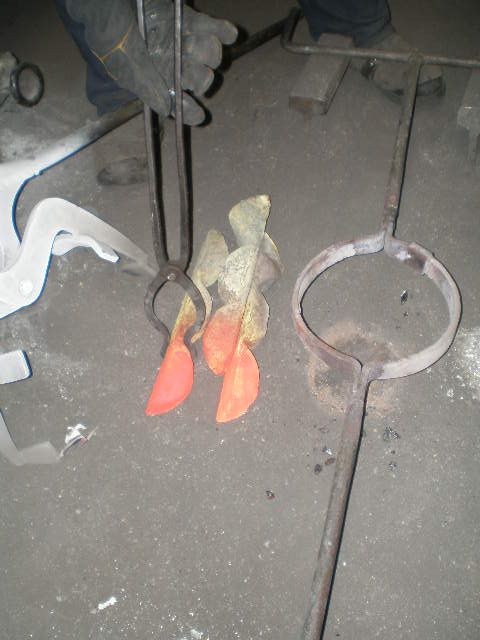
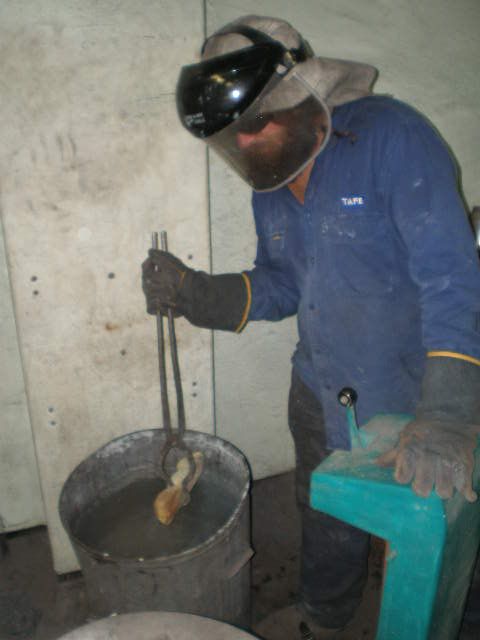
In a perfect world, I'd have a little gas barbeque burner set up to heat the bin, running off the TAFE gas, to do the heating, but this isn't and I don't. Instaed, I heat up brass ingots in the furnace and quench them in the water. Nine quenches or so does the trick. I have to keep and eye on the ingots, since I am, after all, heating them in a furnace built to melt the things. The metal can get soft and mushy if you leave it to red-orange.
I did at first use iron ingots, which have a higher melting point, but after a while of heating and quenching they shattered.
The red end is the end that rises proud of the crucible in the direct flame, and therefore is hotter than the rest of the ingot.
The plaster is left in the water until the next class day (in two days time). That night, as I'm straightening out the sheets in the bed something small, round and golden flies out and lands on the floor. Thank Christ for that.
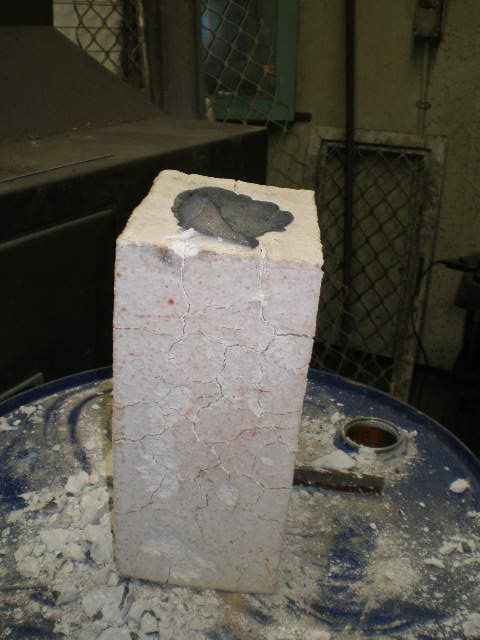
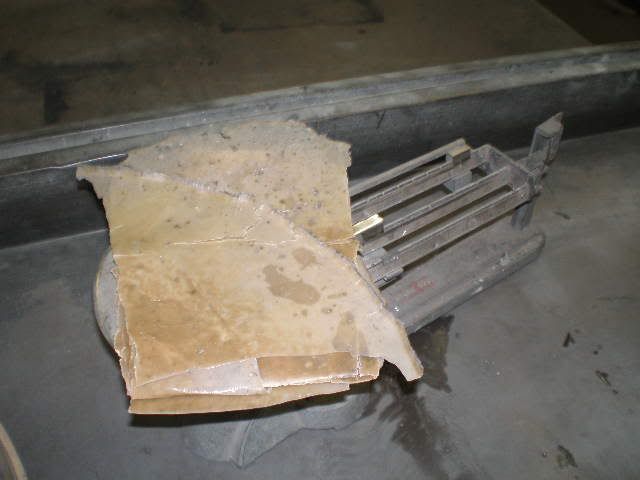
The next work day, the wax is in a hard layer on the surface. Weighing the wax, it comes to close to 100g. Not too bad.
I might just post this now, before something unfortunate happens.
And so this records the creation of my Lord of Change, using the Lost Wax process of casting.
First thing I realised is that I didn't have to try and copy GW. This is Chaos, right? And Tzeentch, the Changer of the Ways at that. They would look like all kinds of different shit, some scary, some sad, some cute, some just plain weird. I'd be best served keeping everything I make unique.
Unique. Original. Every single figure. Ummm... shit.
So I start by just working some wax into shapes while thinking, and then I start thinking... eyestalks.
The wax I'm using here is a custom blend of bee's wax and, ummm, something else (might be petroleum jelly. The wax bloke told me, but I forget) at a ratio to create a wax that is carveable at room temperature but mouldable at body temperature. It's also sticky enough to accept having extra bits of wax added and merged in easily.
The creature starts taking shape. I'm sticking it on a base here to make sure it fits. A fantasy base, since that's what I have handy.
The finished wax. I'm trying an idea here where the staff is in three pieces, but still floating in place as if it is whole, just hovering there in space. As "hovering in space" is a difficult trick for metal to do in the real world, each piece is in fact connected to the figure. The centre is of course held in its hand, while the top piece brushes against an eyestalk, and the bottom 'happens' to rest against his leg.
Behind the Lord of Change, you can see a Verminlord that I was using as a size comparison while I was making the figure.
Next, he has to be connected to a tree. You see here the Lord of Change surrounded by other daemons of various types. The trunk of the tree is aluminium, short wax in-gates attach the figures to the trunk, and drips of molten wax are used to solid the join (don't skimp on the molten wax. Something coming loose later is a major, and often irretrievable, disaster)
The important thing to know about this tree when understanding how it works, is that it is, in a very real sense, upside down.
Upside down, upside down, Miss Jane!
Looking at it this way, the metal pours into the top, and the mushrooming out at the top creates a handy pouring cup. The metal runs down the stalk, through the in-gates, and into the figures.
Near the top, you can see thin wax lines running from the figures. They're called whistlers, and allow air to escape. They're attached to every significant high point where air could be trapped, and can sometimes be a bit of a delicate bugger to attach.
As you can see, there's a fair amount of figures, stuck all around in any way they can fit, and the whole thing is rather complex. This is to get the most figures for the least amount of time and material, although there are drawbacks to doing this. (More on that later)
Notice the gap between the top of the stalk and the top of the figures, which is a bit of an odd thing considering I've just intimated I'm trying to get the most out for the least cost. The reason for this is two-fold. Firstly, the extra height provides more pressure from weight of metal to push the metal into the figures, and secondly, and more importantly, to try to prevent shrinkage. As the metal hardens, it shrinks, and when it shrinks it draws in molten metal to fill the void, and it firstly tries to get it from above (letting gravity do the work). This means the metal level in the pourer spout will drop from the level you fill it to, sometimes quite precipitously (depending upon the shape of your job). If the level falls below the level of your job, you will likely get shrinkage in your job. Throw it away, try again.
Shrinkage is something you always have to keep in mind when casting. The metal will shrink. It will try to draw in more metal. Where will it draw it from? If you don't give it an easy source, it'll create one of its own.
Also, only liquid metal shrinks (OK, all metal expands and contracts, solid, liquid or gas, but for this foundry usage of the word "shrinkage", OK?), and mostly when hardening, and it only draws from liquid metal. This means a few things, some you can take advantage of, and some you have to look out for. For instance, a thin spindly job attached to a thick chunky pourer will freeze off well before the pourer, meaning the job will be able to draw from the pourer till it freezes off, and then the pourer can't draw from the job (this is partly what I'm doing). If you reversed that, having a thin pourer into a thick job, the pourer would freeze first (drawing from you job), and then your job would be isolated and would cannibalise itself.
A thick pourer is a bugger to cut off, and so you may want a thin connector between the two (the connection between the pourer and the job is called an "in-gate"), which is easier to cut. However, if that thin connector should freeze before the job, then your job may be cut off from its metal supply, and it will cannibalise itself. This can often be avoided by making the in-gate short enough so that the nearby heat of the pourer keeps it molten. You hope.
If it's a big job, and the pourer is too far away, then all the best intentions in the world wont stop shrinkage in the far reaches. In this case, you can use "risers", which are extra shafts, similar to the pourer, connected to your job. The metal rises up in them from your job while you're pouring, and you continue pouring until all risers are full (if they don't fill properly, you can also pour metal down into them, and pray). Then while your job freezes off, it can also draw from the risers; they also help prevent air from being trapped. A teacher once told me that as a rule of thumb, a riser protects a radius equal to twice the riser's diametre.
Anyway.
Weighing the completed tree. As you can see, only the latest high-tech gear for us!
As I already know the weight of the aluminium stalk, this step tells me how much wax is in the thing (and it's a step I regularly forget. Oh well.)
With a weight of 462g, but the stalk is 350g, that leaves 112g of wax. Must write that down somewhere, or I'll forget.
Into the plaster box! This is a top-down photo, where the tree has been screwed onto the side of the box by dint of a small hole and bolt. It's important to leave a comfortable margin between the wax and the sides of the box. I generally go for about 15-20mm (about 3/4 inch for you Yanks)
The actual box design. All it is is four sheets of steel, two are 350 x 300mm, and two are 650 x 300mm. The last 50mm of each long end is then folded in a right angle. These sheets then form the four sides of a box, with the folded tabs butting up against the neighbouring sheet enabling them to be clamped together. The clamps were made out of 25 x 6mm flat bar mild steel, with holes drilled and tapped to take four bolts running along the length.
This creates a box that can be adjusted to any size inside the length of the sheets, and if you need a larger box, just cut some longer sheet steel. It has, of course, no bottom. Put a sheet of something underneath (I use sheet steel), and then seal the join all around (I'm using masking tape here, which is enough to do the job).
The plaster goes in. It would have been nice to take a few photos of pouring the plaster, but I'm working on my own here and frankly it's either pour plaster or take photos, and the plaster's setting fast. Suffice to say it's a fraught operation as plaster is heavy and if you pour the weight of it on your wax tree you will likely knock something loose, so you have to be careful (and you didn't skimp on the wax drips when attaching the waxes to the stalk, did you? This is when it comes back to bite you). However, the plaster is also setting very soon, so you have to be fast. Careful and fast; a wonderful combination.
To help the plaster get into all the spaces, and to try to displace bubbles, I've also stabbed my fingers nto the mix and agitated them around a bit. Tapping the outside walls of the box to try and create ripples also sometimes works.
Another point. The plaster is heavy, and any decent height of it (15cm or so) will bow the sides of the box if made out of the thin material I have. Brace them with something.
The plaster mix here is 500ml plaster to 500ml grog* to 500ml water per litre capacity of the box. This makes a firm mix that I'm experienting with, and I may add a little more water on later jobs. The firmer the mix, the harder it is to pour and get into intricate spaces but the better the plaster quality you get for firing.
* Grog is an aggregate added to improve the thermal shock and crack resistance of plaster and ceramic. It can be made out of many different things, eg firebrick, fired ceramic, or in this case old fired plaster (which I seem to have a lot of lying about, for some reason
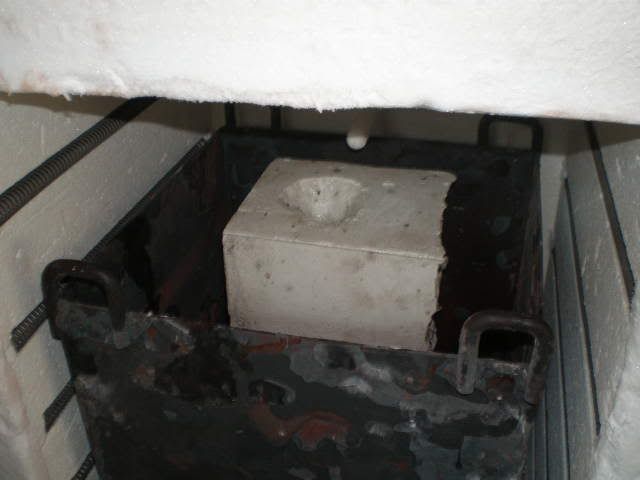
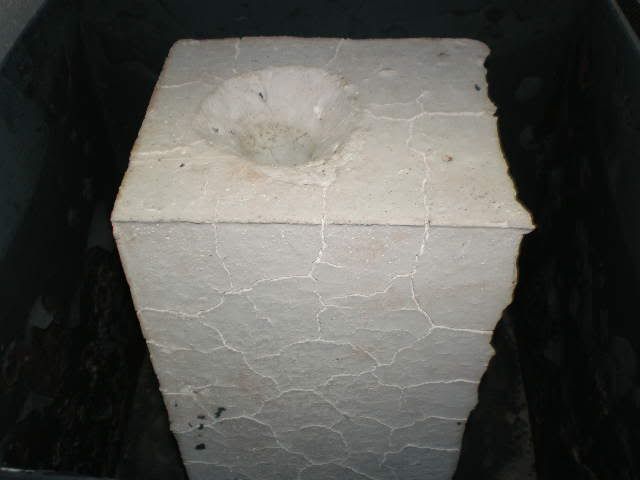
After the plaster's hardened, the aluminium stalk is removed (come on, you didn't actually think it was staying in there did you? How would I pour the metal in?) This set up is just a bolt screwed into the hole in the base of the stalk through a brace, and a nut screwed down the bolt pushing against the brace therefore pulling the bolt (and stalk) up. Note carefully the extremely shoddy welding on show. If I ever offer to do some welding for you, RUN!!!
With the stalk gone, the pourer is clear, including a nice funnel. The three dark splotches near the rim are the three whistlers to let air out. While they are around where I'll be pouring metal, near the rim like that they're not a problem (and it's just so bloody convenient, being able to attach it all together in one portable lump)
Around this point, I notice I'm not wearing my wedding ring, which I always wear despite that over the last couple of years it's become a bit loose. It must have slipped off somewhere. When do I last remember it being on my finger? I don't. What have I done today where it could possibly have slipped off without me noticing? Sudden recollection of me stabbing my fingers in and out of thick setting plaster. Oh shit...
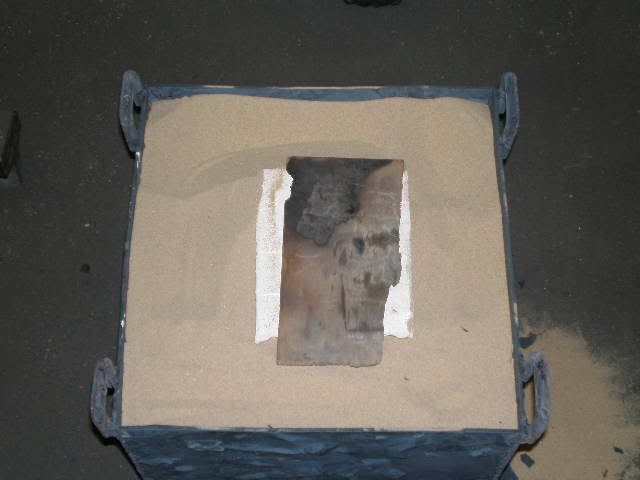
The next step is to take the wax out, preferably recovering as much as possible of it for re-use.
It would be possible to do this in an oven, put the plaster in upside down and melt it out, except for a few problems. Firstly, it seems that if the plaster is allowed to dry prior to the firing process, it worsens cracking during the firing; secondly, the wax tends to soak into the plaster instead of dripping out the holes; finally, melting wax out of a heavy block of plaster is a long operation, and if left unattended in an oven the wax may reach smoking temperature, and possibly even catch fire. For these reasons, my preferred method is to immerse the plaster in water and bring the water to boil. It keeps the plaster moist (which also prevents the wax from soaking in), the temperature wont exceed 100C (so no risk of burning the wax, or the building), you can leave it and a large enough body of water will hold its heat long enough to do the job before it gets cold, and the wax collects on top of the water for easy removal. What you see here is an old-style garbage bin. If you look closely, you may see the plaster mould under the murky surface.
In a perfect world, I'd have a little gas barbeque burner set up to heat the bin, running off the TAFE gas, to do the heating, but this isn't and I don't. Instaed, I heat up brass ingots in the furnace and quench them in the water. Nine quenches or so does the trick. I have to keep and eye on the ingots, since I am, after all, heating them in a furnace built to melt the things. The metal can get soft and mushy if you leave it to red-orange.
I did at first use iron ingots, which have a higher melting point, but after a while of heating and quenching they shattered.
The red end is the end that rises proud of the crucible in the direct flame, and therefore is hotter than the rest of the ingot.
The plaster is left in the water until the next class day (in two days time). That night, as I'm straightening out the sheets in the bed something small, round and golden flies out and lands on the floor. Thank Christ for that.
The next work day, the wax is in a hard layer on the surface. Weighing the wax, it comes to close to 100g. Not too bad.
I might just post this now, before something unfortunate happens.